Showing posts sorted by relevance for query pie. Sort by date Show all posts

September 26, 2017

tommy bahama’s key lime pie recipe


Celebrate National Key Lime Pie Day today 
with Tommy Bahama’s special recipe
Drop in to a restaurant near you, 
or whip one up for yourself! 

The one thing that everyone can agree on is that
 the Tommy Bahama Key Lime pie has 
long been a guest favorite and the 
perfect ending to any meal.


Originally, the remote island of Key West wasn’t easily accessible. Transporting food and other supplies was challenging, so local products like Key limes and foods with long shelf lives, such as sweetened condensed milk became essential foods on the island. Now the official pie of the state of Florida, with origins dating back to the early 20th century, one could say Key Lime pie is as American as apple pie.

Tommy Bahama’s Famous Key Lime Pie
Serves 8

Ingredients:
1 10" graham cracker crust
1 egg white
2 1/2 cups sweetened condensed milk
9 large egg yolks
1 cup key lime juice
1 lime, sliced into 8 equally-sized "wheels"
White Chocolate Mousse Whipped Cream as desired (see recipe below)

Preheat oven to 350° F.

Brush egg whites onto uncooked pie shell using a pastry brush, making sure the shell is evenly coated. Pour off any excess egg whites.

Place pie shell in oven and bake for 5 minutes. Shell should look golden brown.

Let cool at room temperature.

While the shell is cooling, mix the egg yolks and condensed milk together using a wire whip until incorporated.

Pour the key lime juice into the mixture of yolks and condensed milk, slowly mixing with the wire whip until incorporated.

Add the key lime pie mixture into the cooled pie shell.

Adjust the oven temperature to 250° F and bake pie for 25-30 minutes. The finished pie should have a "Jell-O"-like consistency.

Place on a cooling rack for 30 minutes at room temperature.
Place in refrigerator for at least 2 hours before serving.

Cut into 8 even slices when serving.


For the White Chocolate Mousse Whipped Cream:
8 fl. oz. heavy cream
3/4 oz. powdered sugar
1/4 tsp. pure vanilla extract
1/2 tbsp. instant white chocolate mousse

Using an electric mixer, combine heavy cream, powdered sugar and vanilla extract in a mixing bowl.

Using the whisk attachment, beat cream mixture on high speed for 2 minutes.

Add the white chocolate mousse to the cream mixture and mix until it reaches the consistency of stiff peaks.

Place the whipped cream into a piping bag with an open star tip.

When serving, pipe it onto each piece of key lime pie. (If you do not have a piping bag, you can simply dollop a generous scoop of the whipped cream onto the center of each piece.)

Cut a slice in your lime "wheels," twist and place in the center of each piece.


ciao! fabiana


photo credit: Tommy Bahama


June 25, 2019

time for pie


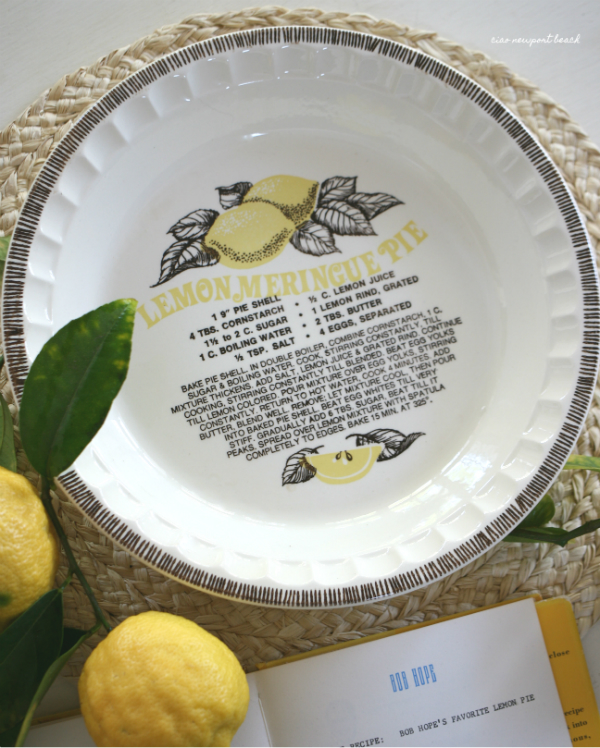
Vintage pie plates are really fun inexpensive collectables. I pick them up here or there at thrift stores, rummage sales or yard sales for only a dollar or two.

Not only are these ceramic pie plates cute, what makes them really fun is that the pie recipe is already printed on them as part of the design!


And I don’t know about your family, but mine absolutely love any kind of pie especially fruity summer pies, so today I’m sharing a few additional recipes that we love.


Martha Stewart’s Strawberry Icebox Pie

Ingredients

10 graham crackers (2 1/2 by 5 inches)
1 cup sugar
5 tablespoons unsalted butter, melted
1/2 cup unsweetened cranberry juice
2 quarts strawberries, hulled and thinly sliced (a few whole berries reserved for garnish)
1/4 cup cornstarch
1/4 teaspoon salt
1/2 cup heavy cream

Directions

1. Preheat oven to 350 degrees. In a food processor, blend graham crackers with 2 tablespoons sugar until finely ground; add butter and pulse until crumbs are moistened. Press mixture into the bottom and up the side of a 9-inch pie plate. Bake until crust is lightly browned, 12 to 14 minutes. Transfer to a wire rack and let cool completely.

2. Meanwhile, in a medium saucepan, combine 3/4 cup sugar, cranberry juice, 2 cups strawberries, cornstarch, and salt. Using a potato masher, gently mash strawberries. Bring to a boil; reduce to a simmer and cook, stirring frequently, until very thick, about 1 minute. Remove from heat and let cool slightly. Stir in remaining strawberries. Pour into cooled pie crust. Refrigerate until set, at least 4 hours (or up to 1 day).

3. In a large bowl, beat cream until soft peaks form. Sprinkle 2 tablespoons sugar over cream and continue to beat until soft peaks return (do not overbeat). Spread whipped cream over pie, leaving a 1 1/2-inch border around edge. Garnish with whole berries. 


Very Berry Cream Tartlets recipe found here


Tommy Bahama's Key Lime Pie recipe found here


Lemon Meringue Pie recipe found here


Homemade Pumpkin Pie recipe found here


Please stop by again later this week 
when I'll share a few of my new vintage finds
from my visit to the Orange Circle yesterday

What’s your favorite collectable?


ciao! fabiana


November 24, 2016

pumpkin pie


What would Thanksgiving be without pumpkin pie? For those of us who LOVE this traditional dessert, we can’t imagine the holiday without the sweet, fragrant filling and flakey crust of pumpkin pie, so perfect with coffee after the Thanksgiving feast. 

The tradition started with the English settlers in Plymouth who brought their pie-making culture to America. The pumpkin, which was a new food for the pilgrims, was soon incorporated into the delicious pie form and gastronomical history was made. It did take a few centuries for pumpkin pie to evolve to what we now are all familiar with. 

I love to buy sugar pumpkins and roast them, as opposed to using canned pumpkin. It’s pretty easy, and I usually prepare it the day before. 

All you do is cut the pumpkins in half, remove the seeds and stem and place cut-side up on a baking sheet. Bake until pumpkin flesh is tender, let cool. It’s easy to peel off the skin once cooled and then puree the pumpkin in a food processor. 

A little water may be needed to smooth the consistency. Here’s my basic recipe which also includes freshly grated ginger and nutmeg. Happy Thanksgiving!   
     
Homemade Pumpkin Pie

Ingredients

1 sugar pumpkin, baked, peeled and then puréed
1 (14 ounce) sweetened condensed milk
2 large eggs
1 teaspoon ground cinnamon
1/2 teaspoon freshly grated ginger
1/2 teaspoon freshly grated nutmeg
1/2 teaspoon salt
1 (9 inch) unbaked pie crust

Directions
1.  Preheat oven to 425 degrees F. Whisk pumpkin, sweetened condensed milk, eggs, spices and salt in medium bowl until smooth. Pour into crust. Bake 15 minutes.

2.  Reduce oven temperature to 350 degrees F and continue baking 35 to 40 minutes or until knife inserted 1 inch from crust comes out clean. Cool. Garnish as desired. Store leftovers covered in refrigerator.


ciao! fabiana

Check out more fun pie recipes here.


June 14, 2022

3 desserts and housewives hosting tips


Today it’s all about three desserts and a couple of my favorite go-to items that I spotted in unusual places. First let’s talk desserts…


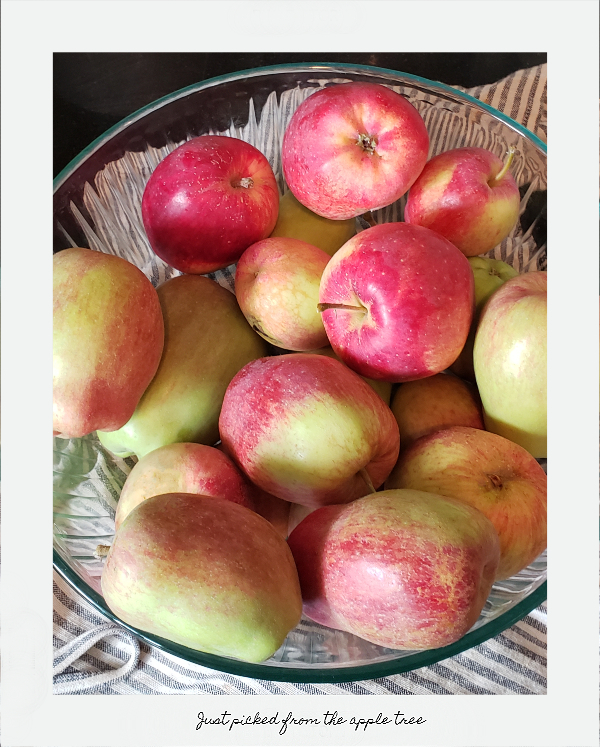
I have a small apple tree in the backyard that I planted years ago, and it produces a massive amount of fruit.


The variety is called “Anna” and it’s a low-chill type of apple, perfect for our southern California climate.


We start getting apples at the beginning of June, and what’s great about this tree is that we’ll get two or three more crops later in the year, so we have apples all the way through fall.


In addition to just being a great eating apple, it’s also a wonderful baking apple. One of my favorite recipes is one I found from Martha Stewart, an Apple Galette.


The crust, aka in French as Pate Brisee, is so easy to make in the food processor and has the most delicious, fresh, flaky flavor. You can make this ahead of time and store it in the freezer for when your ready to use it.


This recipe yields two galettes, and you can substitute all kinds of fruits with this technique. In fact, my neighbor just gave me a huge bag of plums from her tree, so a Plum Galette is next on the agenda.


I experimented a little with this recipe and added a glaze of Bonne Maman raspberry jam on top when the apple galette was almost finished baking.


I just heated up a little jam in the microwave and brushed it over the apples to keep everything juicy.   


Here's just a quick snapshot taken with my phone...


Apple Galette by Martha Stewart

Serves 10 to 12

Ingredients

·   1 recipe Test Kitchen's Favorite Pate Brisee

·   4 teaspoons unbleached all-purpose flour, plus more for dusting

·   2 pounds apples, peeled, cored, and cut into 1/2-inch wedges (6 cups total)

·   1/2 cup granulated sugar

·   1 tablespoon fresh lemon juice

·   3/4 teaspoon kosher salt (we use Diamond crystal)

·   1/4 teaspoon ground cinnamon

·   1 large egg, lightly beaten

·   Coarse or fine sanding sugar, for sprinkling

Directions

Preheat oven to 375°F. Remove chilled dough from refrigerator, unwrap, and place on a lightly floured work surface. Let stand about 10 minutes (to soften slightly). Bang on dough with a rolling pin (to begin flattening and soften a bit more). 


Dust top and pin with flour, position pin on center of disk, and begin rolling dough away from you. Give disk a quarter-turn and roll again. Continue turning and rolling in this manner until you have a 13-inch round with an even 1/8-inch thickness. Transfer to a parchment-lined rimmed baking sheet. Refrigerate while making filling.


In a large bowl, combine apples, granulated sugar, flour, lemon juice, salt, and cinnamon. Spread filling evenly over dough, leaving a 1 1/2-inch border. Fold edges of dough up and over apples, leaving most of fruit exposed and overlapping dough as needed. Brush dough with beaten egg; sprinkle with sanding sugar. Refrigerate 15 minutes.


Bake until crust is golden, apples are tender, and juices are bubbling in center, 1 hour to 1 hour and 5 minutes. Using a pastry brush, spread some of juices from center of galette over apples.


Transfer sheet to a wire rack; let cool 10 minutes. Using a large spatula, loosen galette from parchment and move away from any released juices (so it doesn’t stick to parchment as it cools). Slide galette (still on parchment) onto rack and let cool. Serve warm or room temperature.


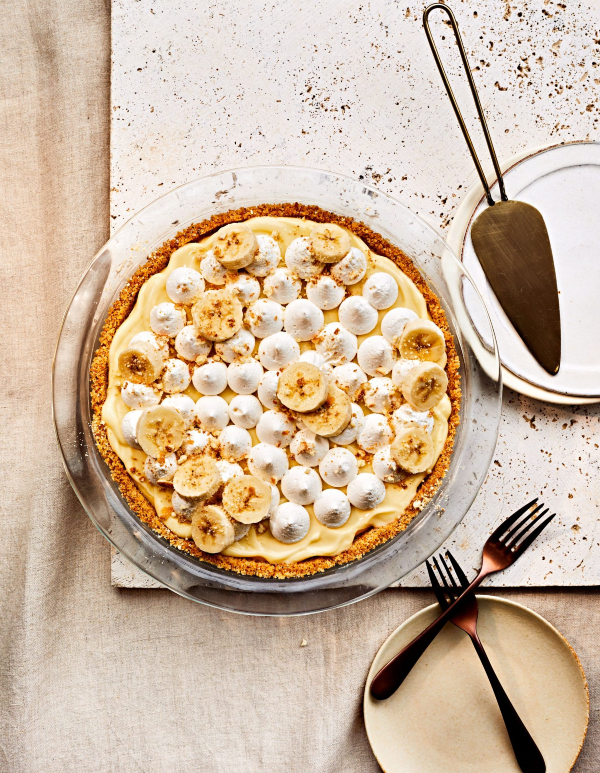
Banana Pudding Pie


Just spotted in Southern Living magazine is this Banana Pudding Pie recipe. Once you’ve had Banana Cream Pie or Banana Pudding, you can’t stop thinking of it!


We occasionally get a really delicious Banana Cream Pie at The Apple Pan in West Los Angeles, which is out of this world.


I had to share this recipe with you all today, just in case you need to make a super scrumptious pie for your next gathering… or maybe we don’t’ need a gathering to make it. I certainly don’t.


Banana Pudding Pie

Ingredients

Brown Butter-Vanilla Wafer Crust

·   6 tablespoons unsalted butter

·   1½ cups finely ground vanilla wafer crumbs (from about 50 vanilla wafers)

·   ¼ cup granulated sugar

·   ½ teaspoon kosher salt

·   ¼ teaspoon ground nutmeg


Filling and Toppings

·   1½ cups whole milk

·   ½ cup heavy whipping cream

·   ½ cup granulated sugar

·   ⅛ teaspoon kosher salt

·   4 large egg yolks

·   ¼ cup cornstarch

·   2 tablespoons unsalted butter, plus more for greasing pie plate

·   1½ teaspoons vanilla extract

·   4 medium bananas, divided

·   Vanilla Bean Whipped Cream

·   Crushed vanilla wafers


Directions


Preheat oven to 325°F. Melt unsalted butter in a small saucepan over medium. Cook, whisking constantly, until butter reaches a deep golden brown and smells nutty, about 3 to 5 minutes. Stir together brown butter, finely ground vanilla wafer crumbs, granulated sugar, kosher salt, and ground nutmeg in a bowl.


Lightly grease a 9-inch deep-dish pie plate with butter, and press crust mixture into bottom and up sides of prepared pie plate. Bake until golden brown and firm, 10 to 12 minutes. Remove from oven; let cool on a wire rack while preparing filling.


Whisk together milk, cream, sugar, and salt in a medium saucepan. Cook over medium, whisking often, until steaming, about 5 minutes (do not let milk mixture boil). Remove from heat. Whisk together egg yolks and cornstarch in a medium heatproof bowl until smooth. Using a ladle, slowly drizzle ½ cup steaming milk mixture into egg mixture, whisking constantly until combined. Slowly drizzle egg mixture into remaining warmed milk mixture in saucepan, stirring constantly until combined. Cook milk mixture over medium, whisking constantly, until mixture thickens and begins to simmer (about 200°F), about 5 to 7 minutes. Remove saucepan from heat; whisk in butter and vanilla. Transfer pudding to a medium bowl, and cover with plastic wrap, pressing plastic wrap directly on pudding surface to prevent a skin from forming. Let pudding stand 15 minutes.


Cut 3 of the bananas into ½-inch-thick slices; arrange slices in bottom of cooled crust. Top with pudding; spread into an even layer using a small offset spatula. Cover with plastic wrap, pressing plastic wrap directly on pudding surface to prevent a skin from forming, and chill until set, at least 2 hours or up to 12 hours. 


Just before serving, remove pie from refrigerator. Cut remaining banana into ½-inch-thick slices. Pipe Vanilla Bean Whipped Cream on pie. Arrange banana slices as desired, sprinkle pie with crushed vanilla wafers, and serve.


Also in Southern Living is another banana recipe that’s a fun take on Banana Pudding. Nilla Wafers are the key to any yummy banana pudding. And aren’t these so cute too?


Spotted on Instagram this week… Our absolute favorite restaurant in Hilton Head is Lowcountry Produce.


We travel to Hilton Head once a year, and always have breakfast and lunch at Lowcountry Produce. I’m talking 4-5 times a week.


Not only is the food delicious, but it’s also has such a nice vibe inside, and it’s so close to our house, which makes it so amazing. We can even ride our bikes there.


What’s so fun to see on Instagram is that they’ve recently started carrying Pacific & Rose tablecloths and tea towels in their indoor market shop. 


You know what a great affinity I have for Pacific & Rose, so it’s such a match made in heaven for me.


I can’t wait to visit later this summer and check out all their amazing linens, home-baked goods, and beautiful paintings they carry. 


They also have an even more beautiful location in Beaufort that I’d love to visit too.


Now on to some real realness… Haha, if you know me, you know that I’m a Real Housewives fan, and have been for years, so while watching the Real Housewives of Beverly Hills last week, I spotted a real gem.


While entertaining Diana in her home, Kyle sets out a beautiful charcuterie tray and my eyes zeroed in on this beauty right away.


I recognized it as on of Vagabond House's gorgeous wooden trays with pewter olive branch handles! 


Known as Vagabond House Olive Handle Serving Tray, it’s one of the more beautiful items that Vagabond House makes. 


They even have a pretty rectangular version of this tray


I can’t get enough of this beautiful wooden serving tray and the way Kyle so effortlessly uses it with cheeses, crackers, grapes, and white ramekins filled with a variety of nuts.


This is such a versatile piece for anyone, and such a wonderful tray to have on hand for last minute entertaining occasions.   


I hope you enjoyed the recipes I shared today, in addition to the pretty table linens and wooden cheese tray I love so much. 


Baking is next on my agenda, and I’m off to get started on a yummy banana treat!


ciao! fabiana


For lots of fun extras, follow me on instagram!


Please note that this post may contain affiliate links.


sub


Related Posts Plugin for WordPress, Blogger...

more recent posts...


Related Posts Plugin for WordPress, Blogger...


Related Posts Plugin for WordPress, Blogger...